
How to Create a Remarketing Dynamic Event Ad Campaign
Dynamic Event Ads: Automated Retargeting for Your Events
Remarketing Dynamic Event Ads
This DEA campaign automates the remarketing for all of your upcoming events under an org/venue.
Depending on what upcoming event someone checks out on your ticketing site, they’ll later see a unique ad based on the show they checked out.
If they already purchased a ticket, they won't see an ad for that event but they may see an ad for another event of yours they were also checking out.
Some of the benefits of this campaign include:
You'll be able to see sales on a per event basis (this is the only campaign type on Facebook where this is currently possible)
You don't have to build a single ad creative
You only need to set this campaign up once and it keeps itself refreshed automatically
This guide will cover:
How to set up a Remarketing Dynamic Event Ad Campaign
Best Practices for your Remarketing Dynamic Event Ad Campaign
Maintenance & upkeep for your campaign after launch
You can also watch a step-by-step video walkthrough here:
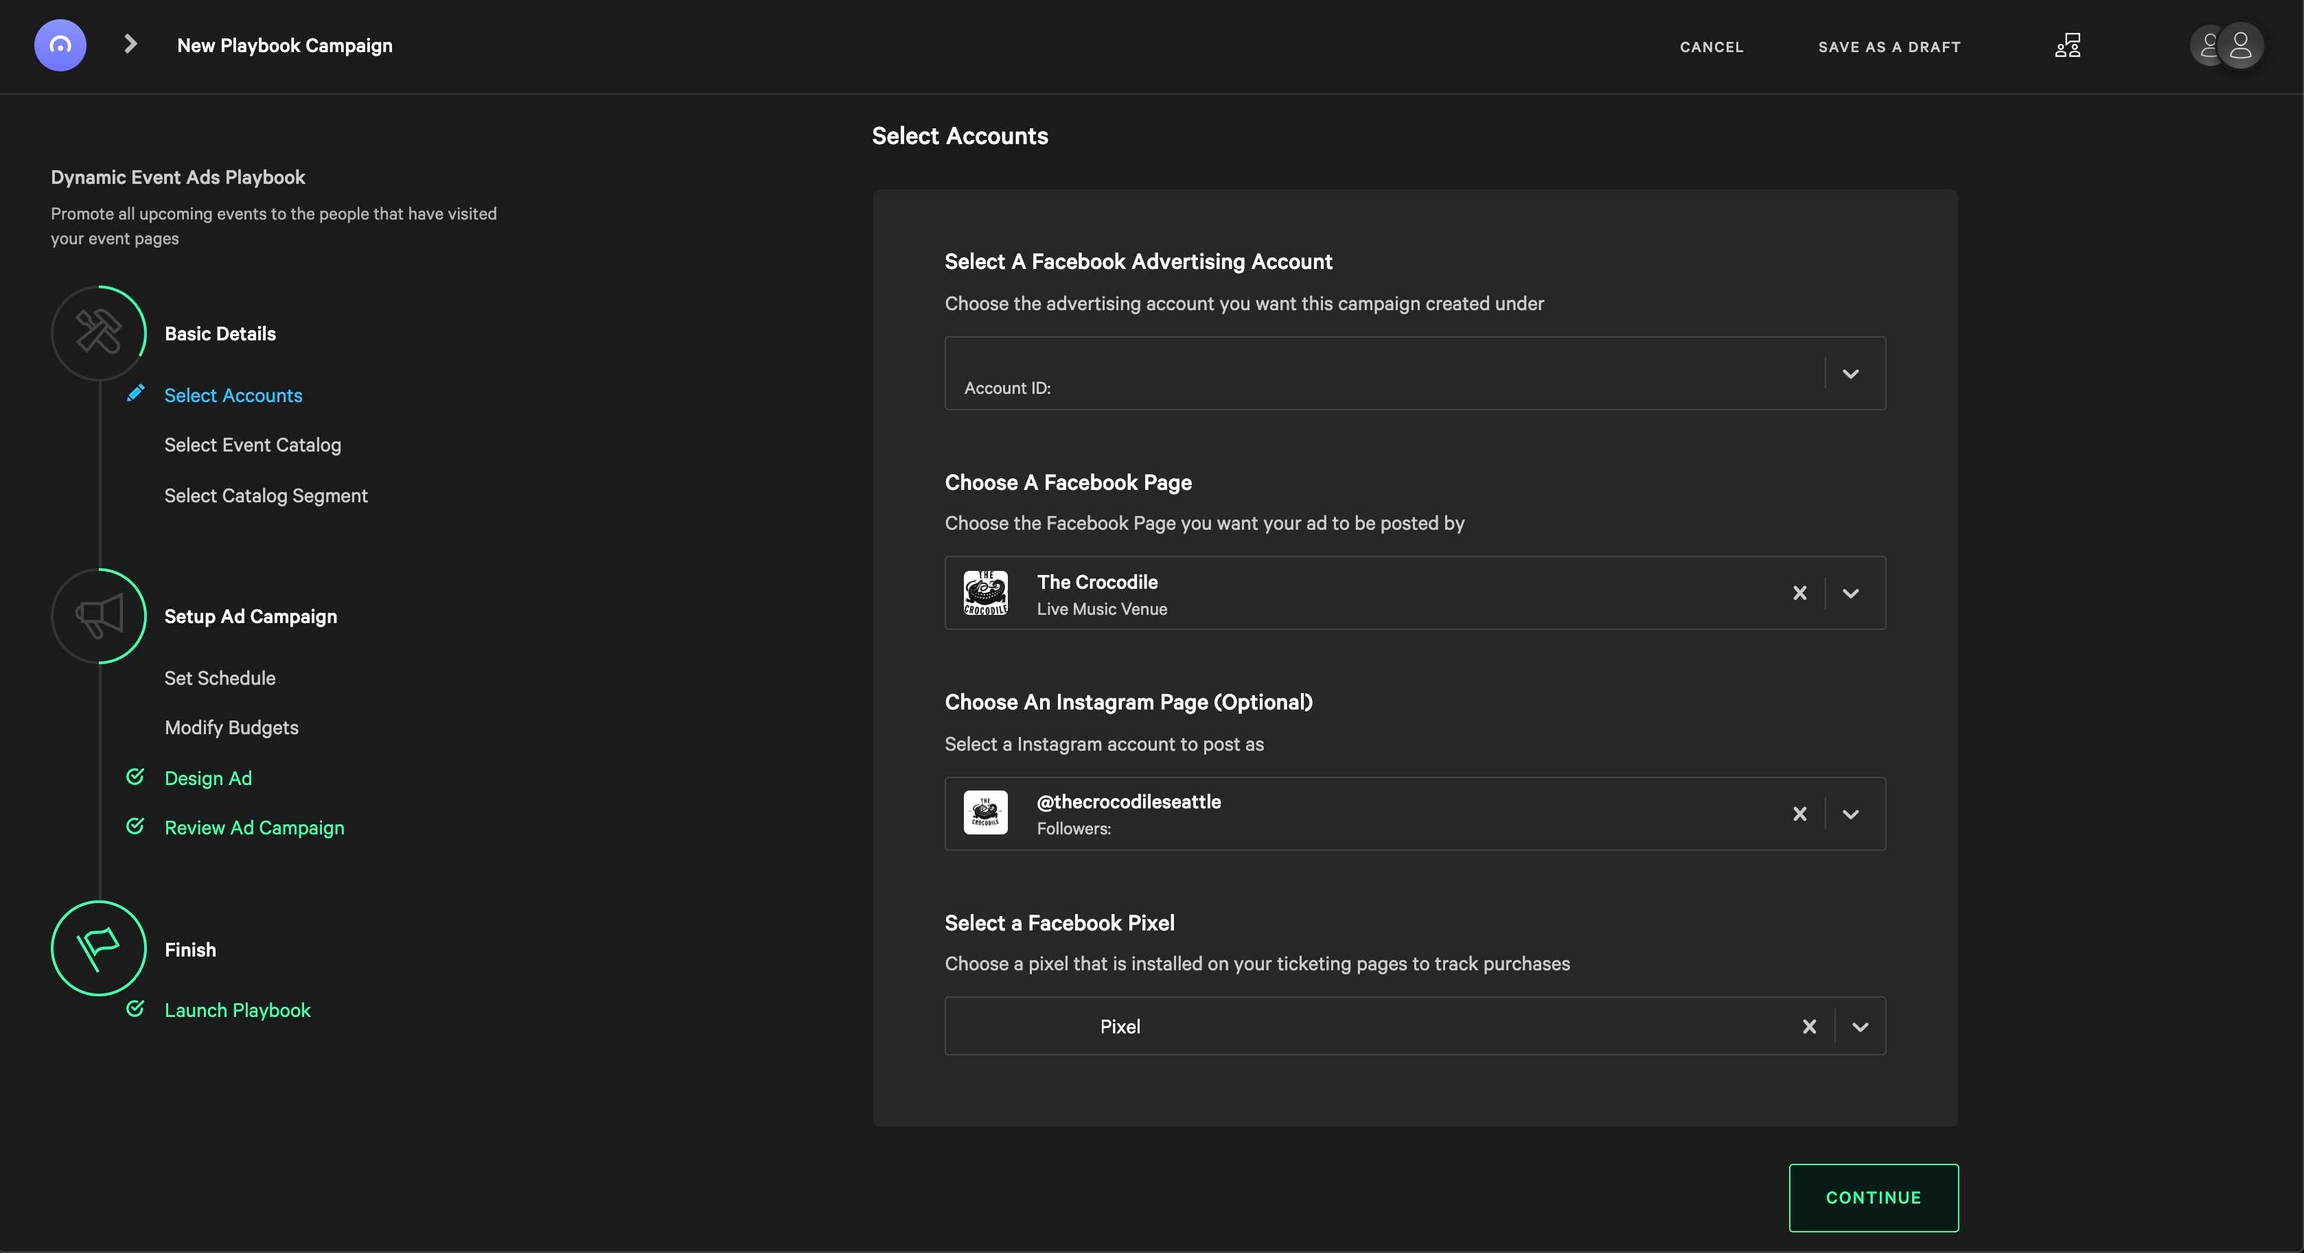
Step 1: Select Accounts
You’ll first choose the Ad Account you’d like to finance your campaign with.
Next you’ll choose the Facebook Page you want your ad to run from.
Then select your respective Facebook Pixel.
Step 2: Select Event Catalog
Click the Generate button to create your Product Catalog.
Select your ticketing provider via the dropdown. Depending on your ticketing provider, the next drop-down step will vary. Here are a few examples:
Eventbrite - Choose the venue/org you’d like to create the product catalog for via the dropdown (based on the EB you synced to your profile)
Ticketmaster - Type out the name of the venue/org
Ticketweb - You'll need to select the "Ticketmaster" in the above dropdown. Then type out the name of your venue/org
eTix- Enter the url for your venue’s/org's eTix page - example
Showclix - Make sure you’ve synced your ToneDen + Showclix seller account
If you’ve already created a product catalog via another DEA campaign, you can select it via the dropdown.

Takeaway: In order to generate this product catalog, your ad account first has to be inside of a Business Manager account - for more context on how to set this up click here. You can also use this section to create a catalog of shows from multiple orgs/venues.
Step 3: Catalog Segment
If you’d like to segment the shows that your DEA campaign is advertising there are a few options:
Time Segments
All Events
Events that are happening within 30 days (Closeout)
Events on sale in the past 30 days (On-Sale)
Location Segments
If you have multiple events in separate locations under one org, this option can help you segment which events are being advertised.
Since this campaign's audience is based on your web traffic, no need to specify a location here if all your events are in the same place.
Product Catalog Exclusion
Below you can choose which events to exclude from being advertised by your campaign.
If you notice multiple options for a singular event here, it means that you have multiple ticket types for an event.
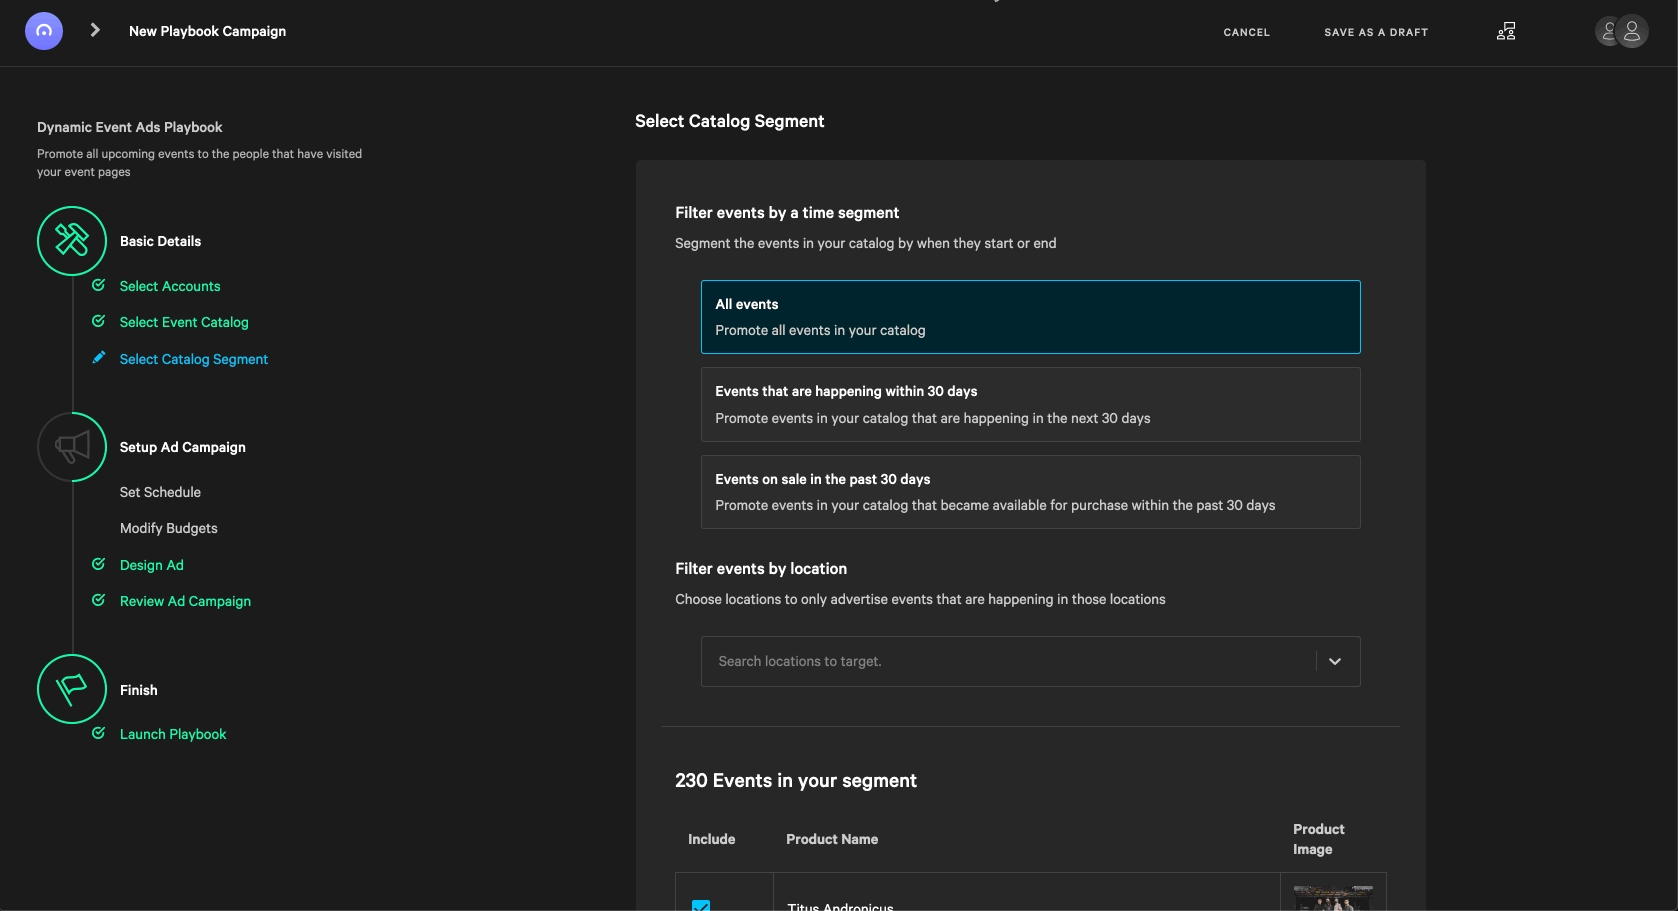
Takeaway: We recommend selecting All Events in this section as it leads to the highest overall return.
Step 4: Schedule
We recommend either of the following scheduling options for your DEA campaign:
Month to Month - Schedule your DEA campaigns on a month to month basis. This will allow you to view sales on a per month basis for the campaign.
Continuous - You can set the campaign for as long as you want. As this campaign is entirely automated, you could theoretically set this up to run for the next year if you wanted to.
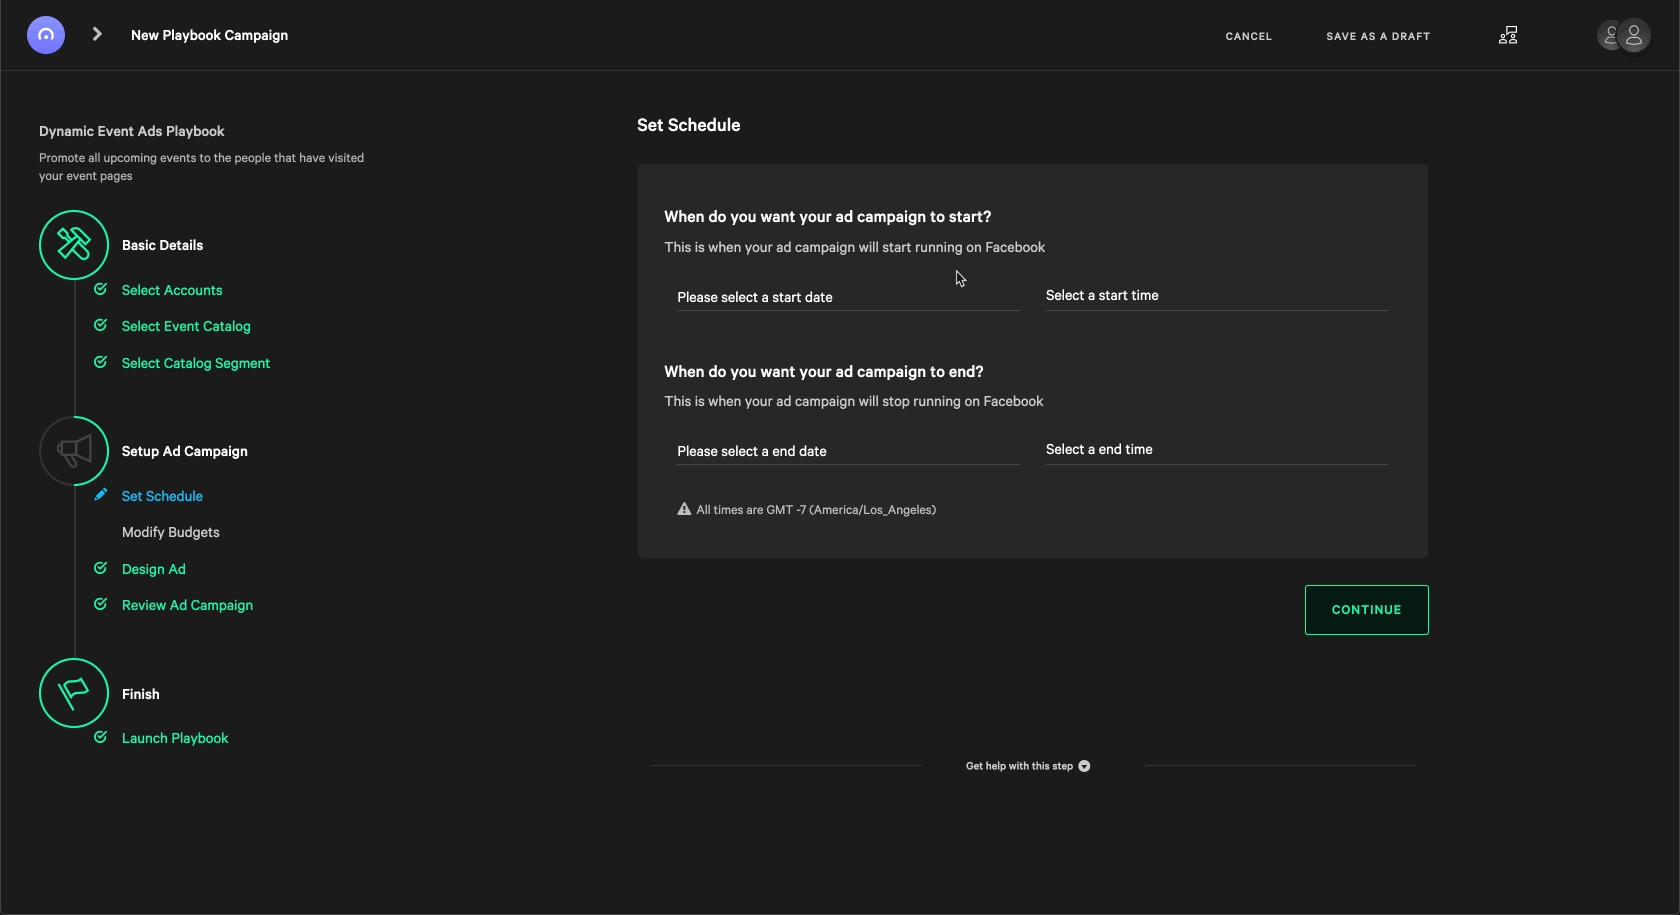
Takeaway: When new events go on-sale, they'll automatically be added to your campaign's product catalog. When an events passes or becomes no longer available, it will be automatically removed from your campaign.
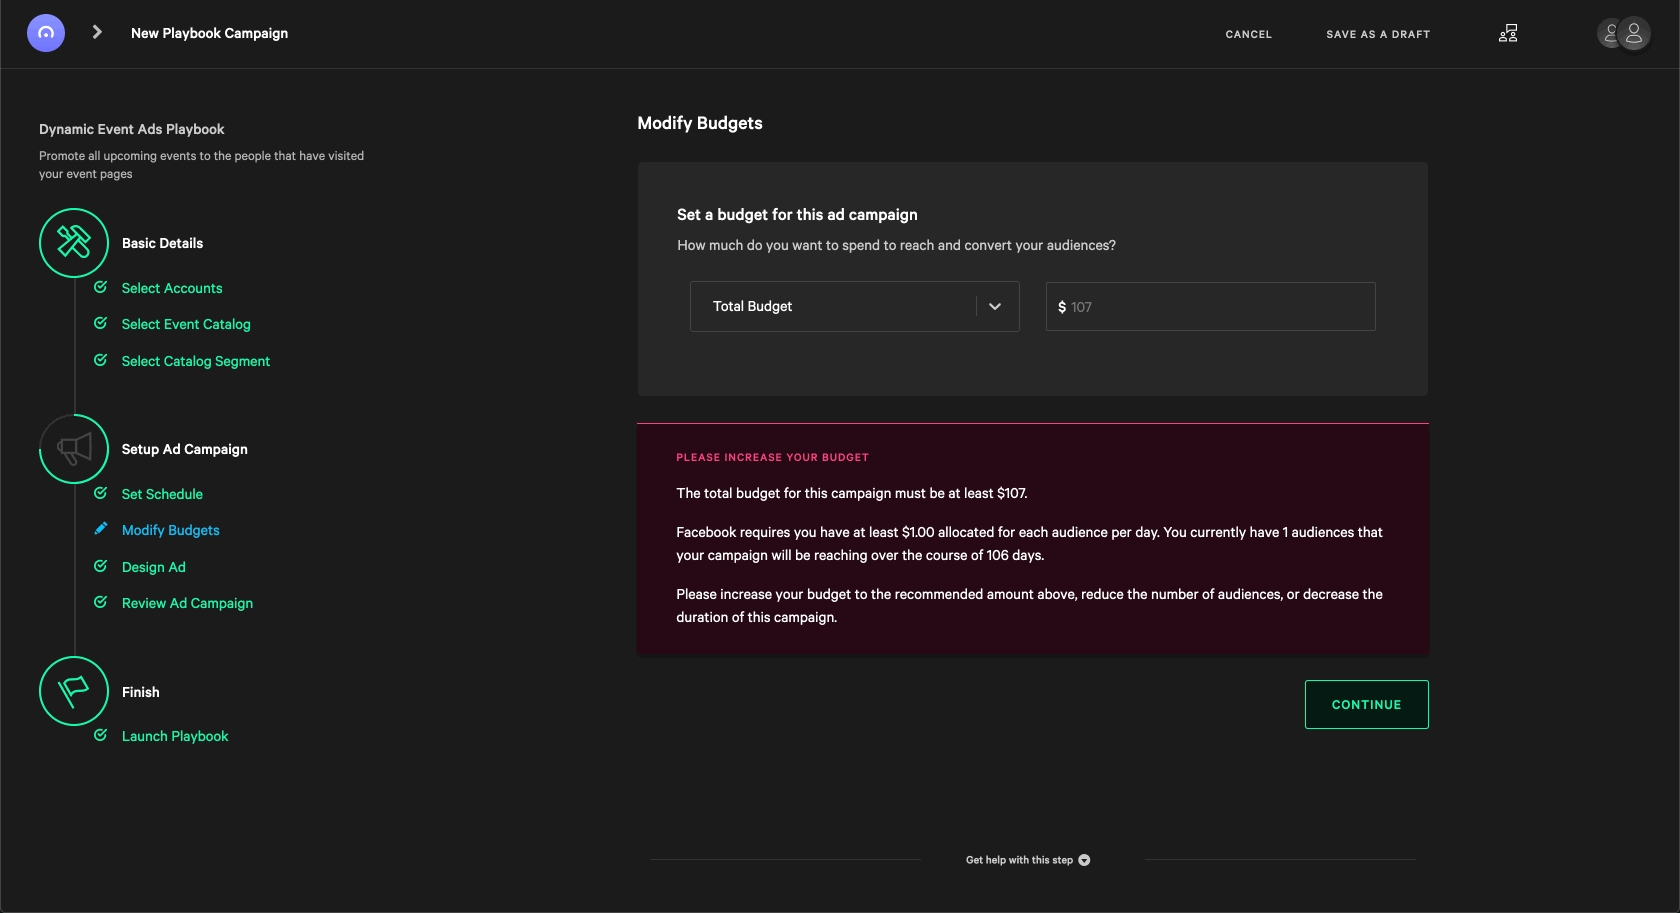
Step 5: Budget
Remarketing DEA - Start w/ a daily spend of $1 per day. You can scale this up to $5/day as time continues and the size of this audience increases.
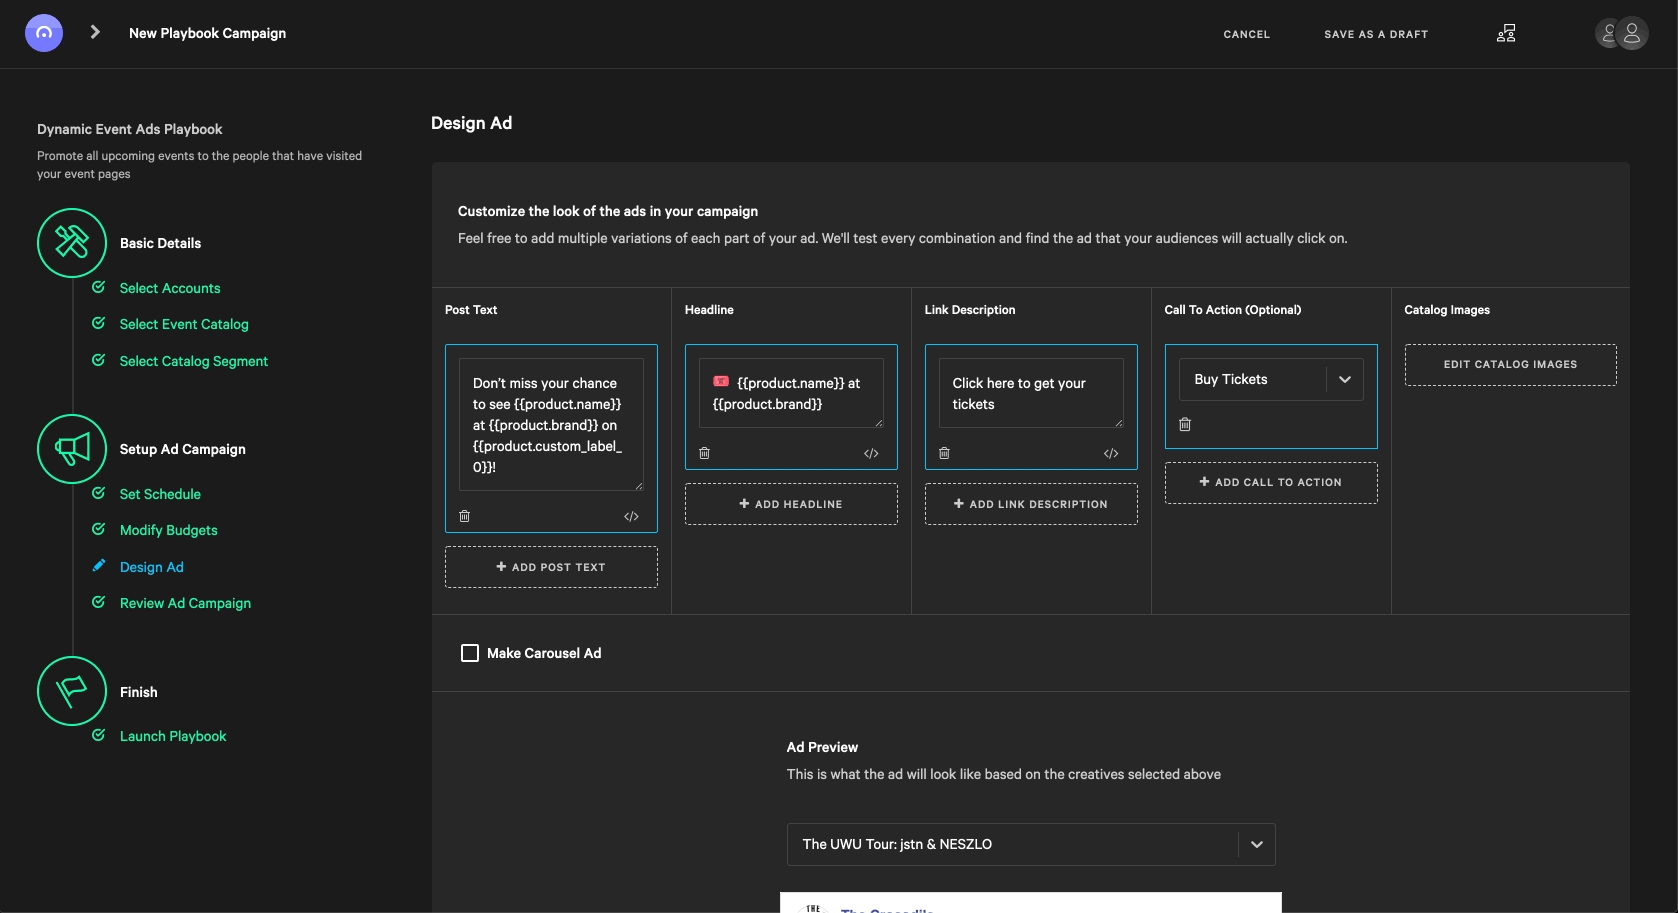
Step 6: Design Ad
The nice part about this campaign is that the creatives are made automatically (meaning you don’t have to build a single ad copy).
The placeholders {{product.name}}, {{product.brand}}, {{product.custom_label_0) correspond to the name of the event, the location of the event, and the date of these event respectively.
These placeholders will pull the info from your ticketing provider's API to automatically build the ad copy for you (additional placeholders can be added by clicking the icon).
Feel free to customize this section to your liking. But make sure to not mess with the placeholders or you’ll break the automation of the campaign. Any changes you make to any of these components will be reflected across all of your dynamic ad's copies.
Use the dropdown above the creative preview, you can preview the ad copy for each event that is advertised by the campaign.
You can always change the image on a per event basis using the "Edit Catalog Images" button towards the top right. If you want to change anything pulled in by the placeholders, you'll have to change it on your event listing page.
Campaign Maintenance
The only things you'll need to do once you have launched the campaign include:
Updating the images for new events once they're added if you don't want to use the stock image on the event listing page
Changing up your ad copy every month or so to keep your creatives fresh
Updating your budget if you see good returns (I wouldn't recommend exceeding $5-10 day here)
Extending the budget of the campaign
Excluding events from the campaign in the "Select Catalog Segment" section when you don't want a certain event being advertised or an event has sold out
Last updated
Was this helpful?