
How to Install Your Facebook Pixel on Eventbrite
A step-by-step guide on installing your Facebook Pixel on Eventbrite.
Installing your Facebook Pixel is essential for measuring your ad's effectiveness. Leveraging your pixel data not only allows you to more efficiently reach your target audiences, but it allows you to better understand how your campaigns influence conversions.
Installing your pixel may seem very complicated, but luckily Eventbrite's self serve pixel installation tool makes installing your pixel very easy!
Learn how to install your facebook pixel for Eventbrite events by watching the following video or see below for a step-by-step support article.
Installing Your Facebook Pixel
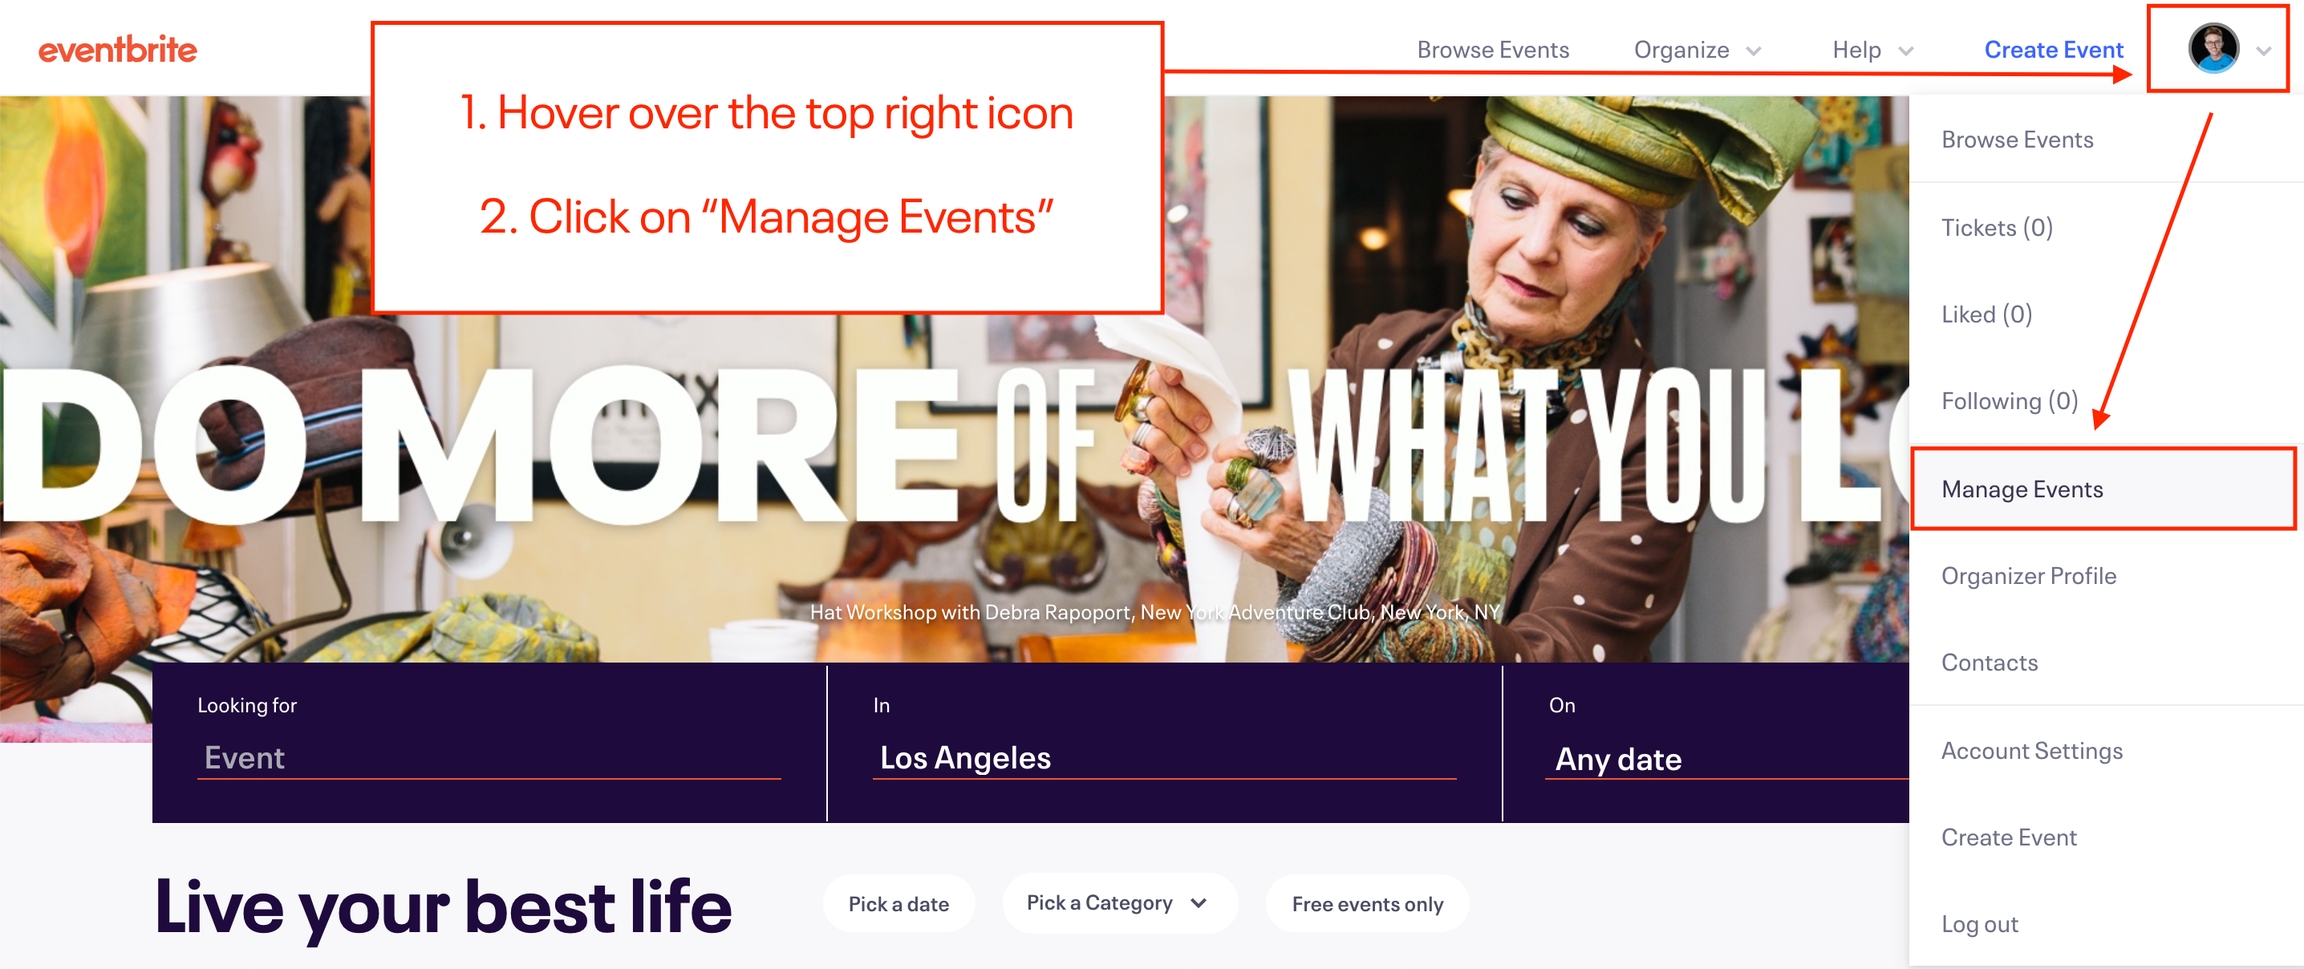
First, log in to your Eventbrite dashboard and navigate to the Manage Events section.
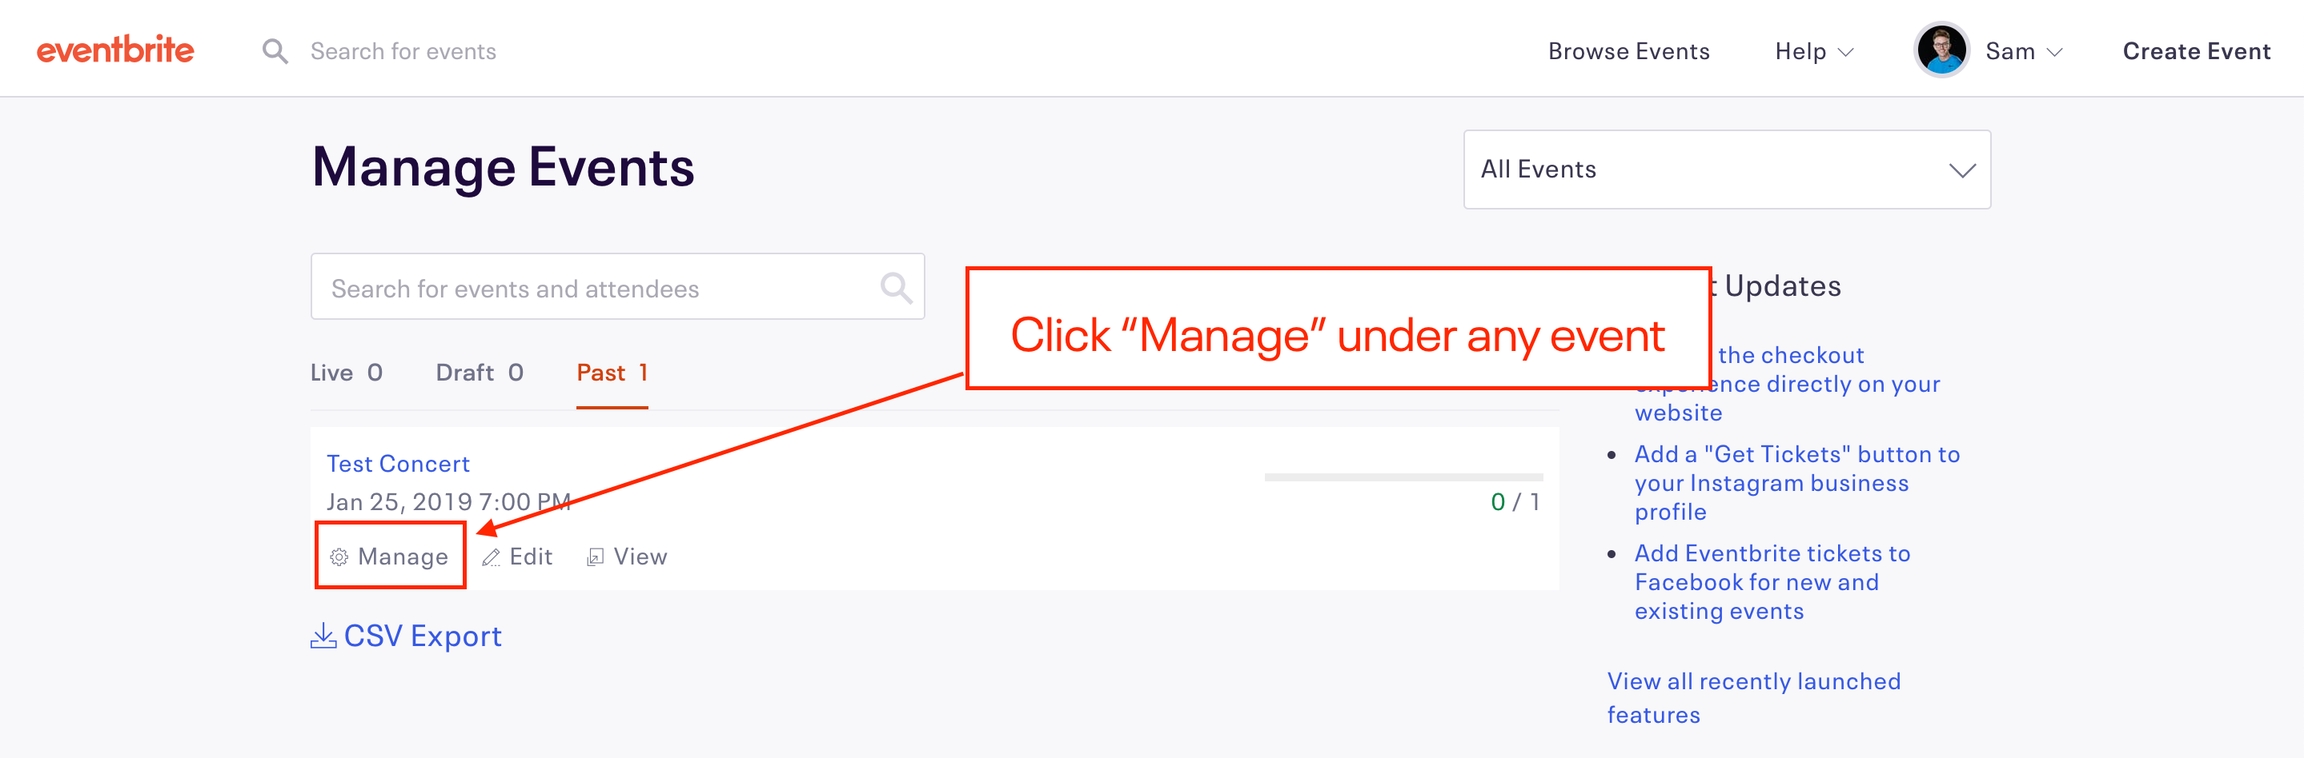
Next, click ⚙️Manage under any of your Eventbrite Events.
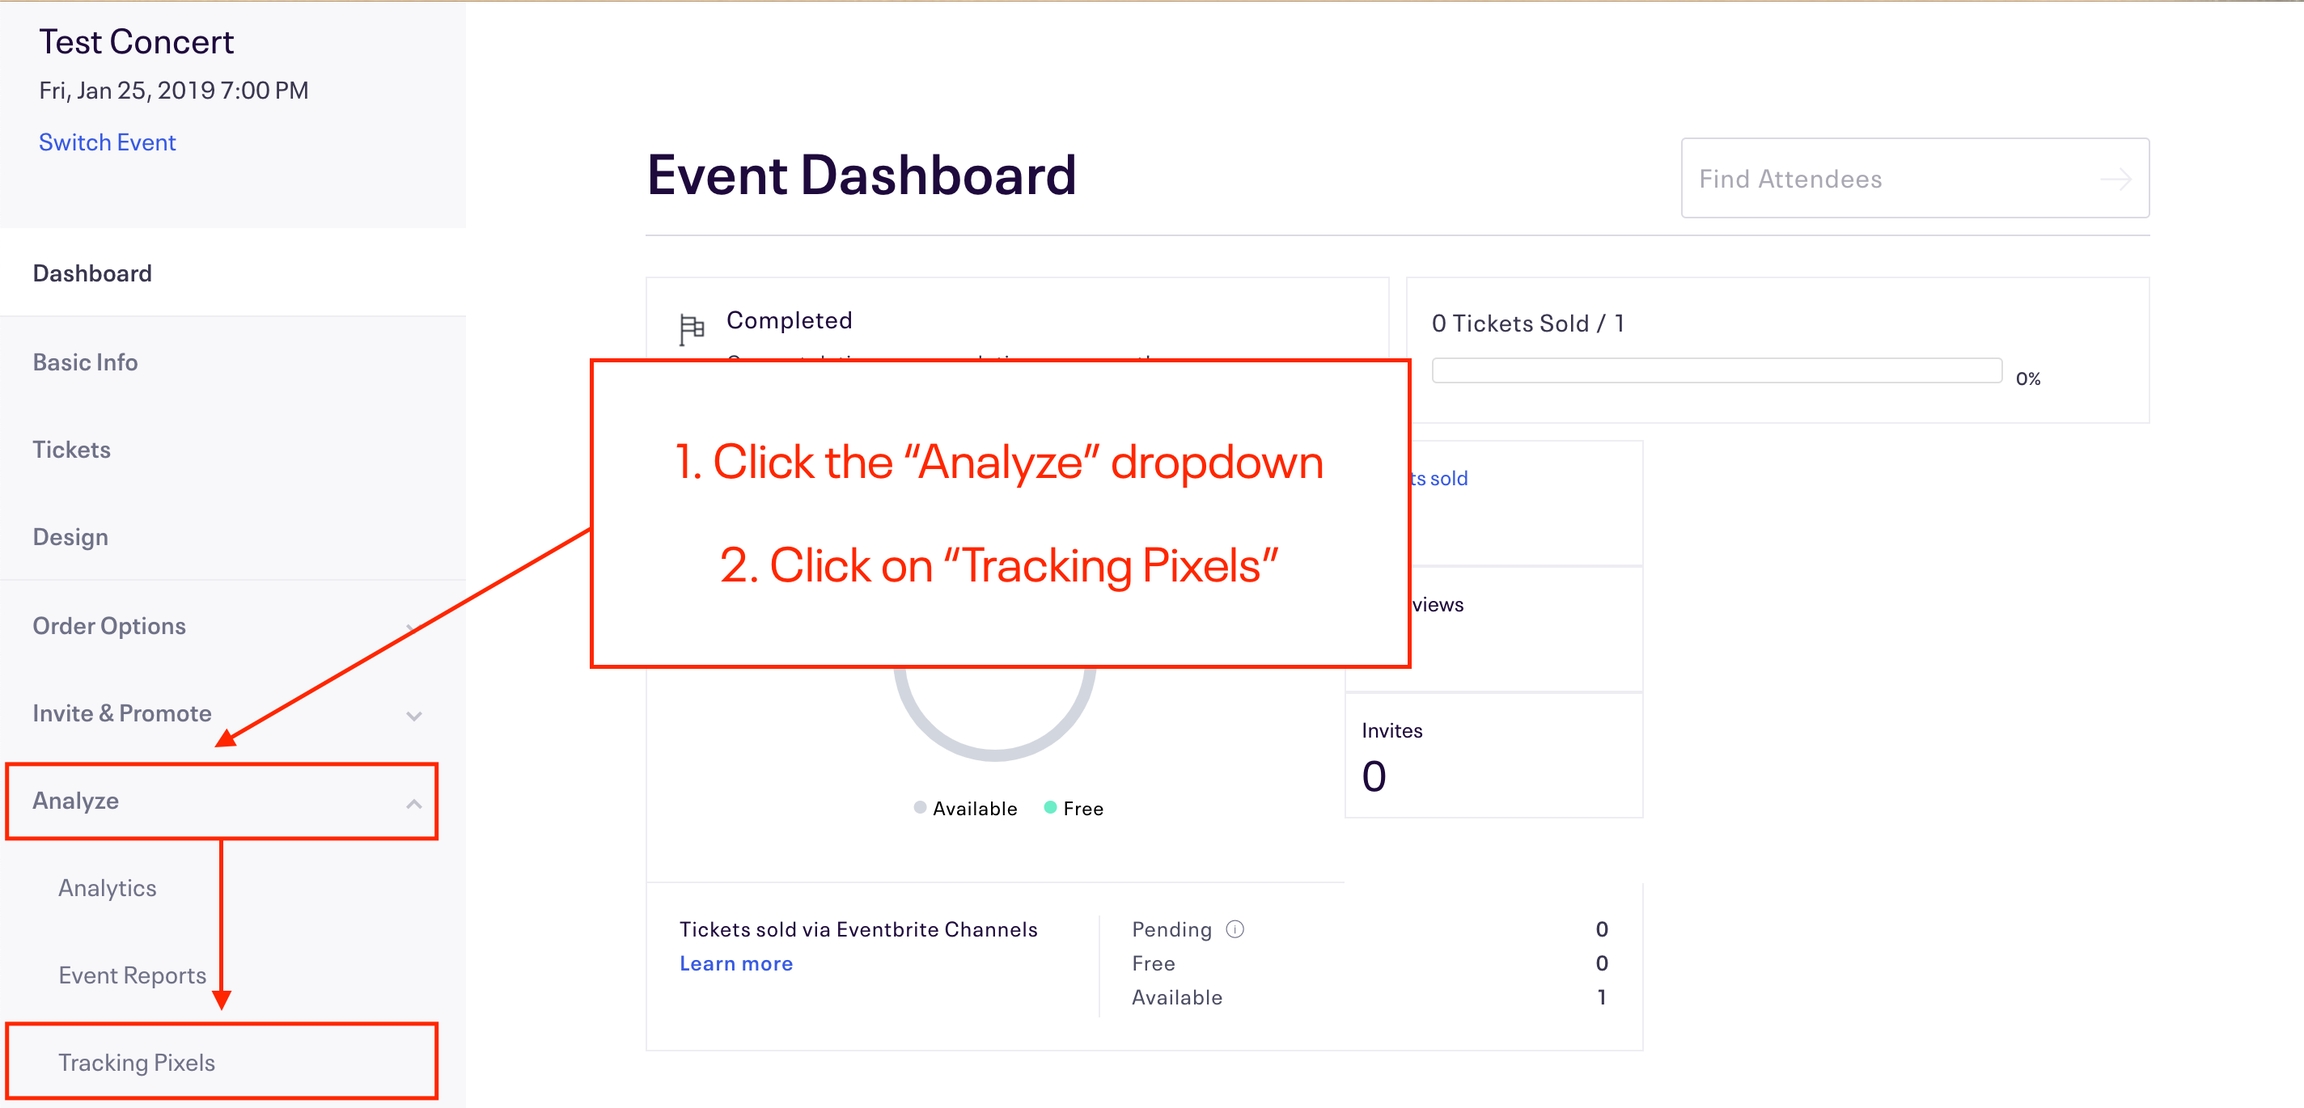
Next, click on "Analyze" to expand the dropdown on the left-hand side of your screen. Click on "Tracking Pixels" under the dropdown menu.
Adding Your Pixel
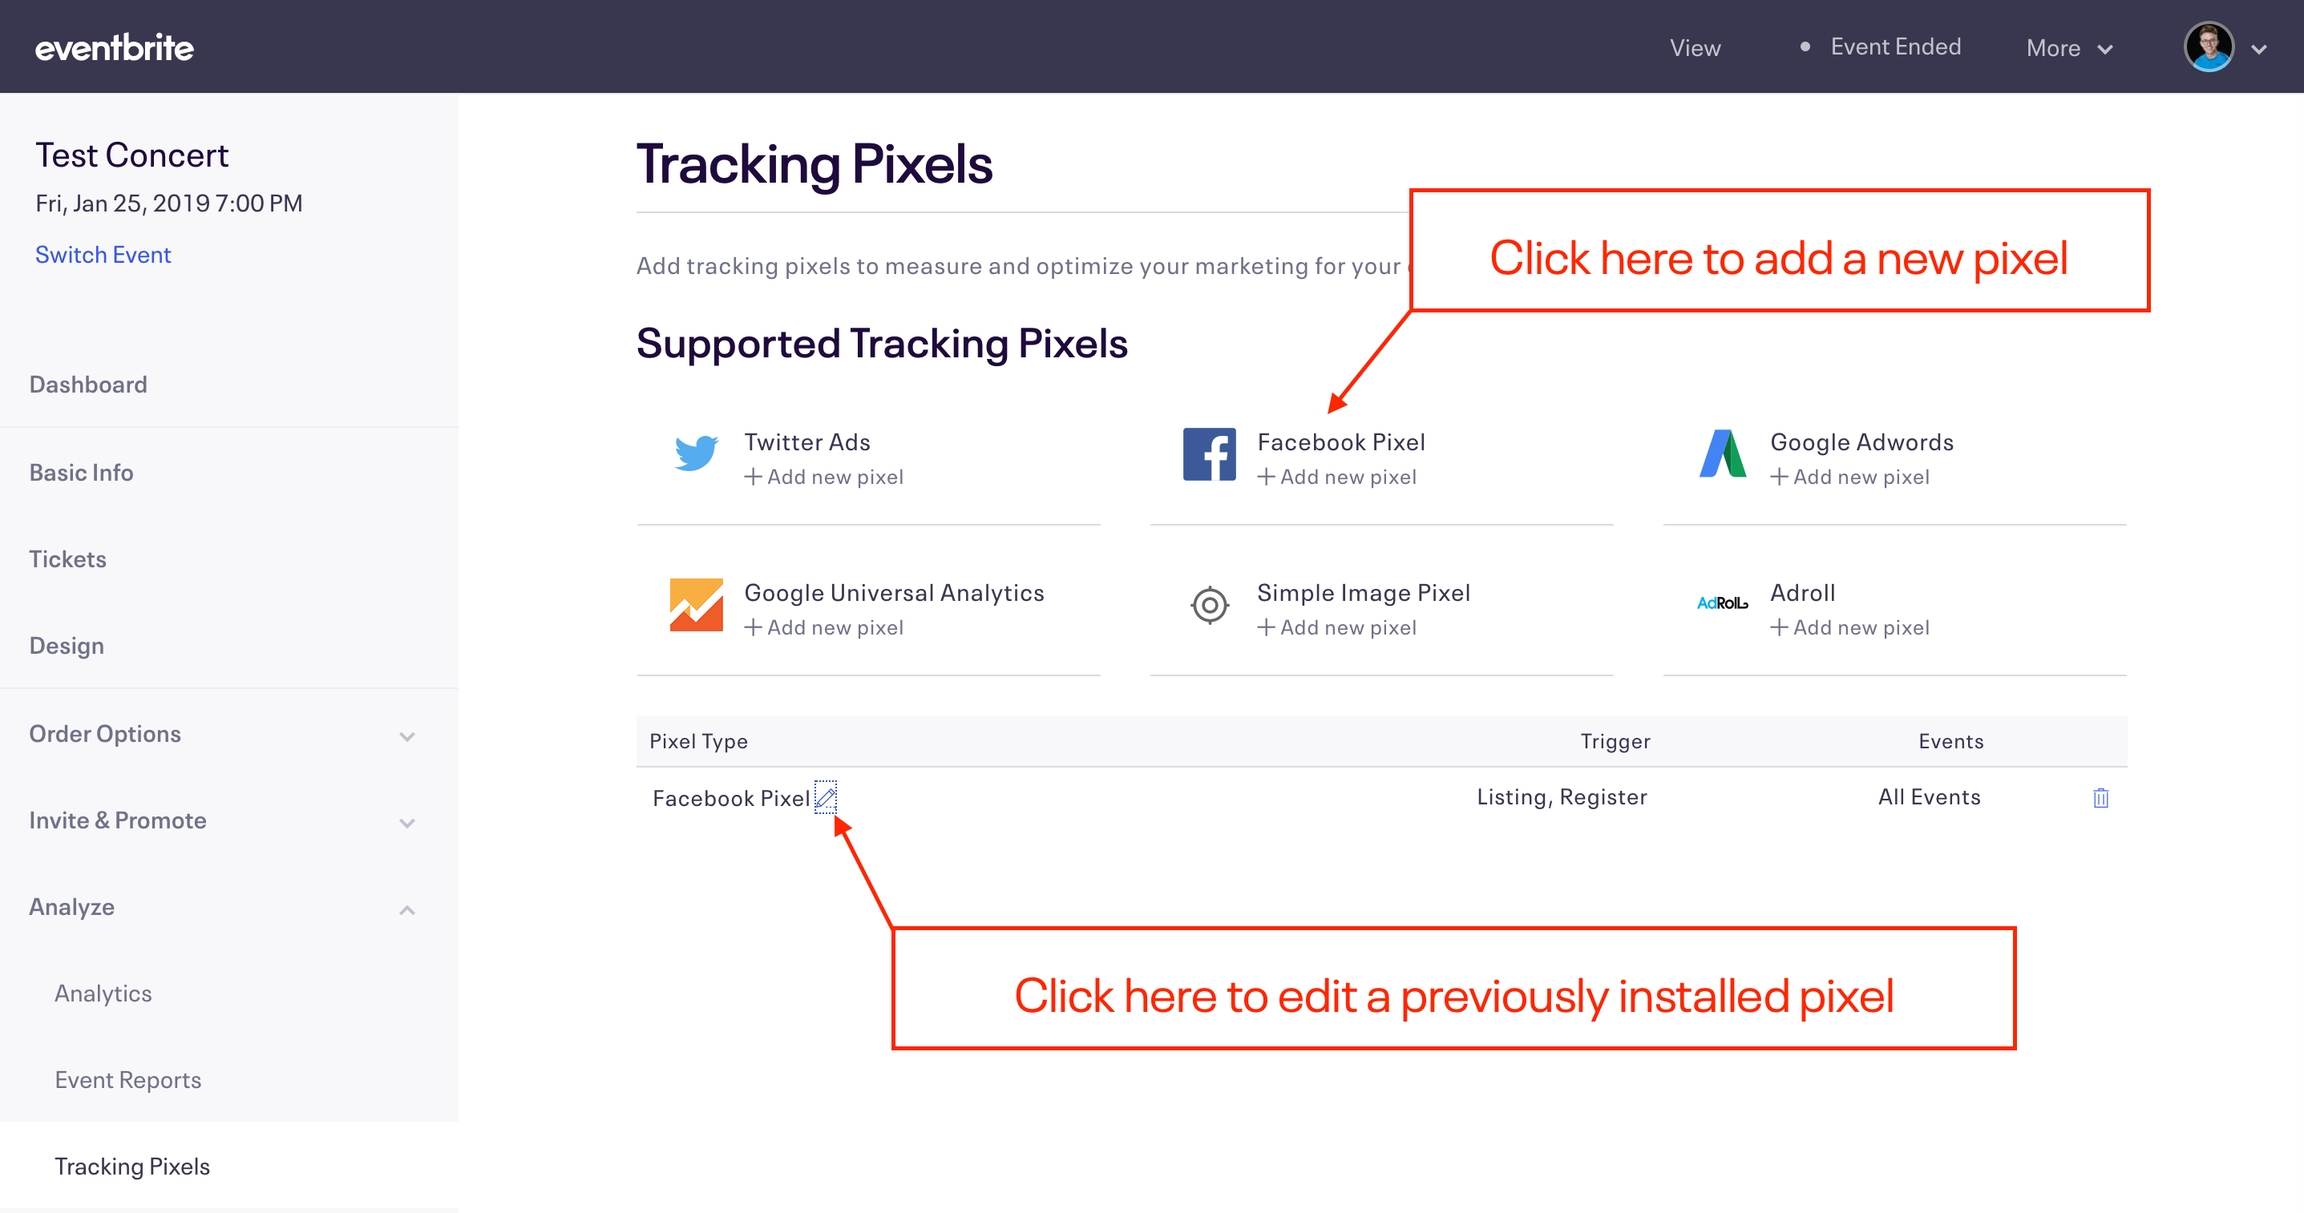
Click where it says "+Add new Pixel" near the Facebook icon to install a new Facebook Pixel.
If you've previously installed a Facebook Pixel, you can retroactively edit that pixel by clicking on the ✏️pen icon to the right of any listed pixel below.
We generally recommend installing one pixel across all of your events under an organization. If you select "All Events," you'll only need to do this process once. Your Facebook Pixel will then automatically be added to all future events.
Copy and paste your Facebook Pixel ID in the field below.
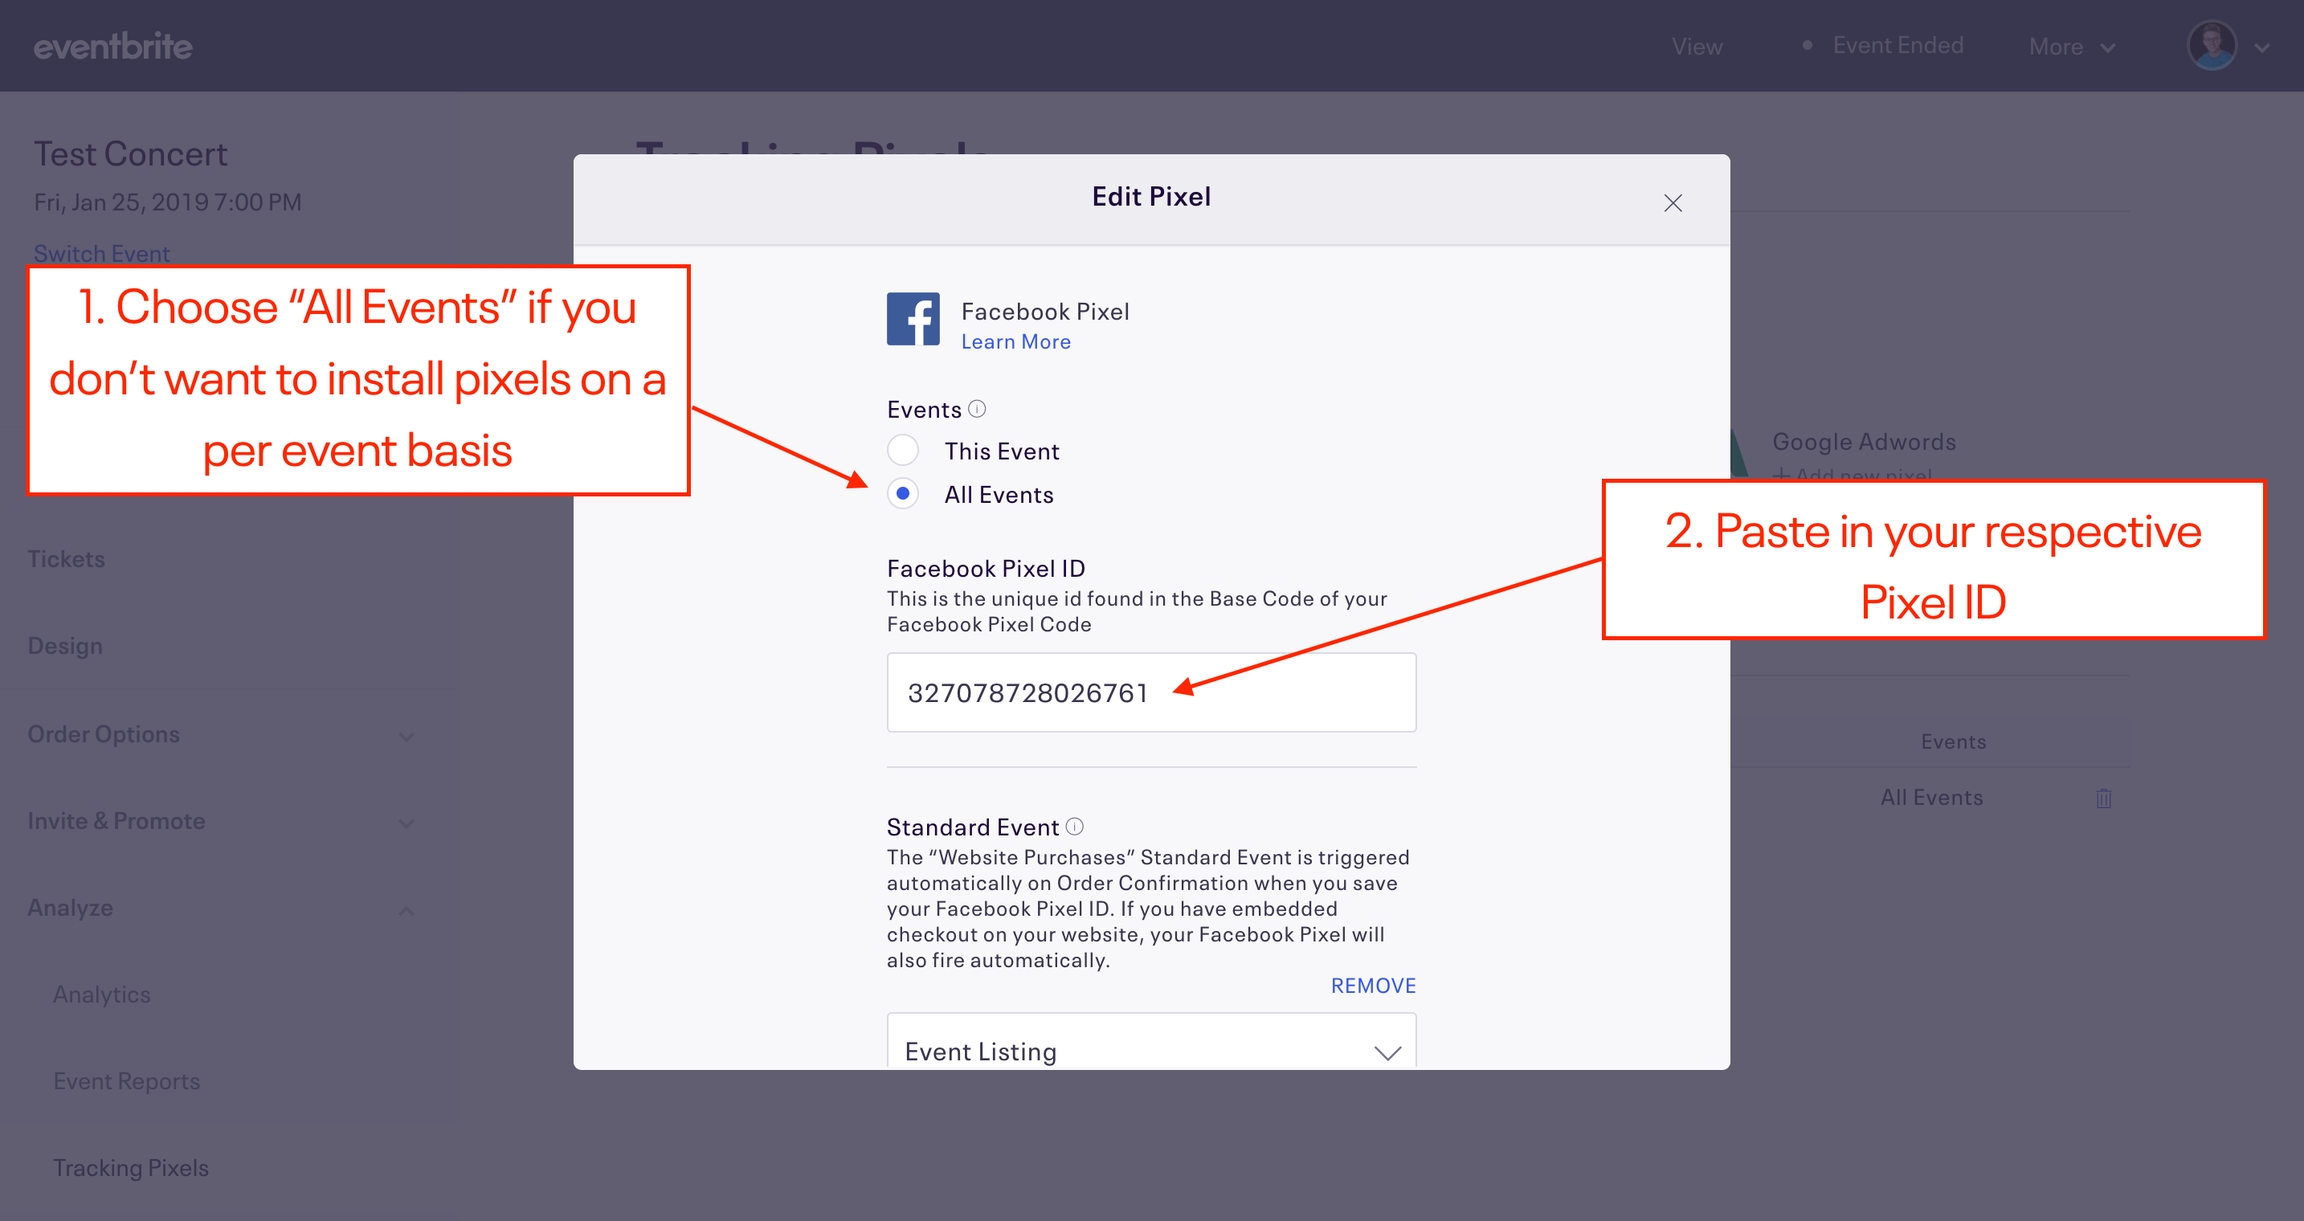
Pro Tip: If you don't know how to find your pixel ID, here's our guide!
Add Standard Events
After pasting your Pixel ID, click "⨁ Add Standard Event" to add 2 additional Standard Events.
You can add your Standard Event to 2 different placements (“Event Listing” and “Event Register”) and use any website actions for your placements. However, we recommend not using the same website action for multiple placements. We also recommend the following website actions for each placement:
• Event Listing → Website Content Views • Event Register → Website Checkouts Initiated
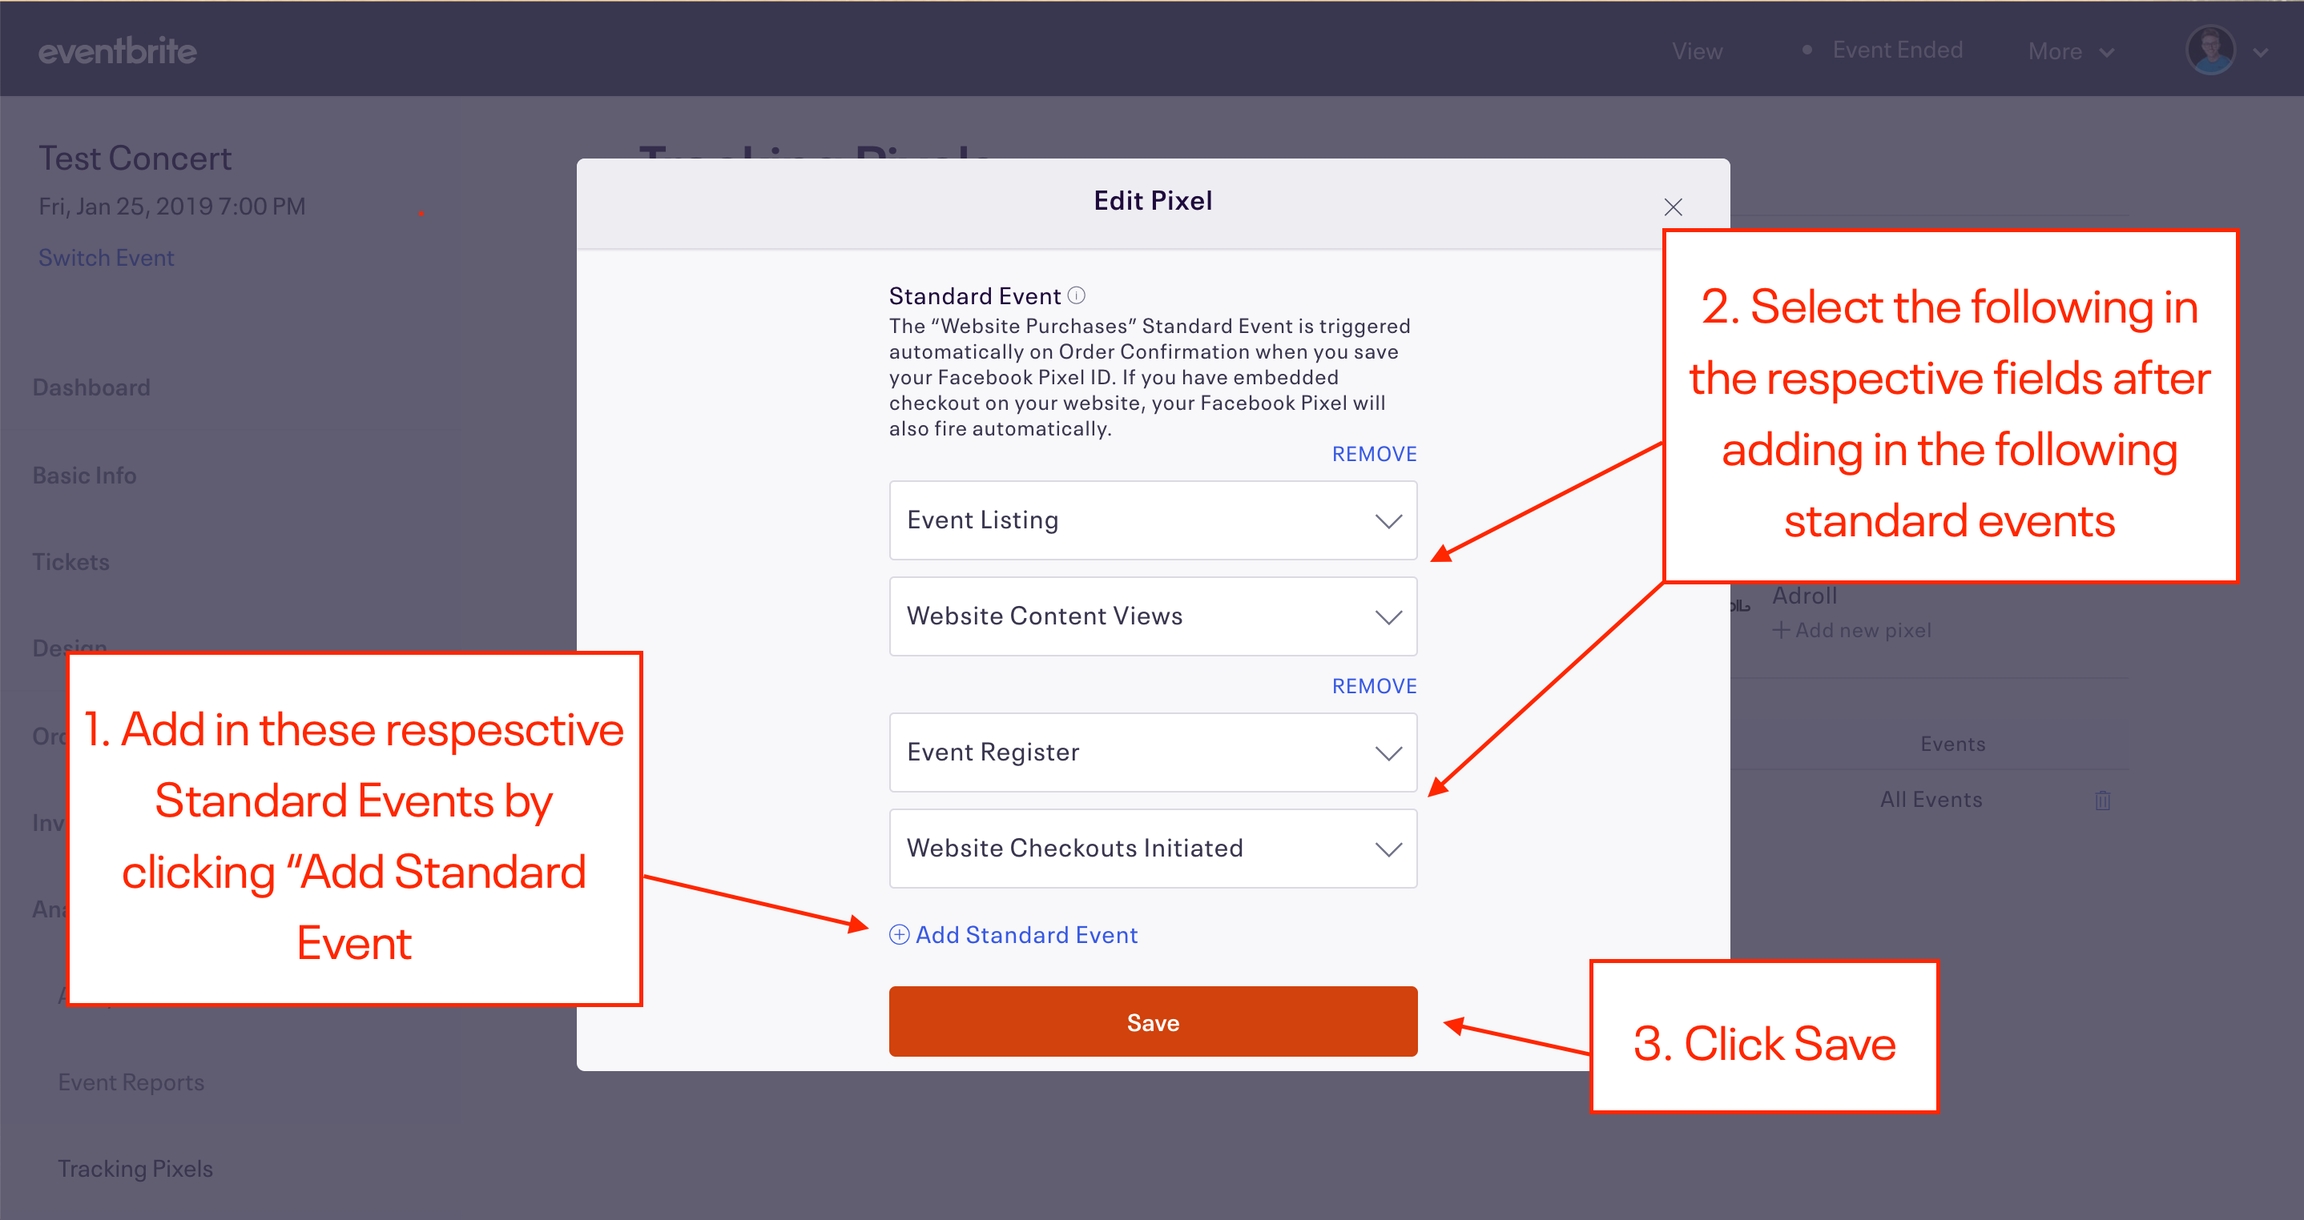
Note: Eventbrite automatically tracks Purchases so there is no need to create this event within Eventbrite.
Once you selected the correct fields via the respective drop-downs, click save and your pixel will be successfully installed!
Last updated
Was this helpful?